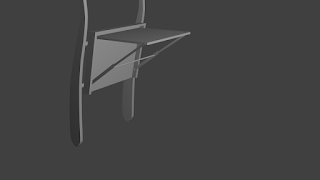
Car backseat tray table mechanical assembly
- To use these pictures first read previous post and refer below pictures to assemble car seat table.
 |
| car seat frame |
once you open leather cover of seat you will find this kind of metal strips or metal rods . you will add two rods or one sheet to give tray system mechanical support as given below
 |
| mechanical support for base |
 |
| base of car back seat table |
Next step is to attach base.
To do this drill four holes in previously attached rods making a square . reapply leather cover and drill four holes in the base of car tray base both should in front of each other
 |
| joints of car seat tray table |
Then drill small holes keeping in mind that upper two should outwards from center and lower two should inwards and then insert four small cylinders which will act as joints(axis of rotation) for top of table tray system
 |
| inserting top of car table tray system |
Drill two more holes in the sides of top of car tray system having same size as of cylinders . so that top can merely rotate around cylinders.
at distance such that small area rotate inside base (will be used later to read position)
 |
| top joint of car backseat table |
 |
| open/close levers of car backseat table |
Drill two holes of size slightly more than cylinders on one side of each step and on the other sides drill holes size of a rivet .
insert one strip on lower cylinder and other hole on the cylinders on the car tray table .Place other two holes in front of each other and attach with a rivet . repeat the process on the other side too.
Manual car backseat tray table is assembled .design of table top is left to user specifications
(next post will be about automatic car backseat tray table)
.


Comments
Post a Comment